What is a GPX Track Log?
GPX (GPS Exchange Format) is an open XML standard for storing GPS data. A GPX track log is a timestamped record of your journey — a sequence of track points, each containing your exact position at a specific moment in time.
Every track point in a GPX file looks like this:
<trkpt lat="48.8566" lon="2.3522">
  <ele>35.4</ele>        <!-- elevation in meters -->
  <time>2025-06-15T14:23:07Z</time>  <!-- UTC timestamp -->
</trkpt>
HoudahGeo reads these track points and matches each photo's capture timestamp to the appropriate position on the track. For complete details on GPX and other GPS file formats, see GPS File Formats Guide.
Getting a GPX File
A GPX file for photo geotagging is a GPS track log recorded on a device you carried during your photo shoot — a GPS receiver, smartphone, or sports watch. The file records your path as a timestamped sequence of coordinates, typically one entry every 1–10 seconds.
The five most common ways to get a GPX file:
- Dedicated GPS device: Export from Garmin Connect, Suunto app, or Polar Flow. All major platforms support GPX export natively. Download the .gpx file to your Mac before opening HoudahGeo.
- iPhone GPS tracker apps: Apps like Trails, GPX Tracker, and OsmAnd record and export GPX directly. A smartphone in your pocket gives 3–5 m accuracy under open sky — no dedicated device needed.
- Android GPS tracker apps: Apps like GPS Logger for Android and OsmAnd export GPX or NMEA files that HoudahGeo reads without conversion.
- Sports watches: Garmin, Polar, and Suunto watches record tracks automatically during any activity. Export the session as GPX from the companion app — the same file you use for fitness analysis works for photo geotagging.
- GPSBabel (format conversion): If your device uses a proprietary binary format, the free open-source tool GPSBabel converts over 100 GPS formats to GPX. Available for Mac, Windows, and Linux at gpsbabel.org.
HoudahGeo Reads Four Formats Without Conversion
HoudahGeo reads GPX, NMEA, Garmin FIT, and Wintec TES files directly — no third-party conversion required for these four formats. If your GPS device exports any of these, drag the file straight into HoudahGeo.
Step 1 — Load Photos and GPS Track
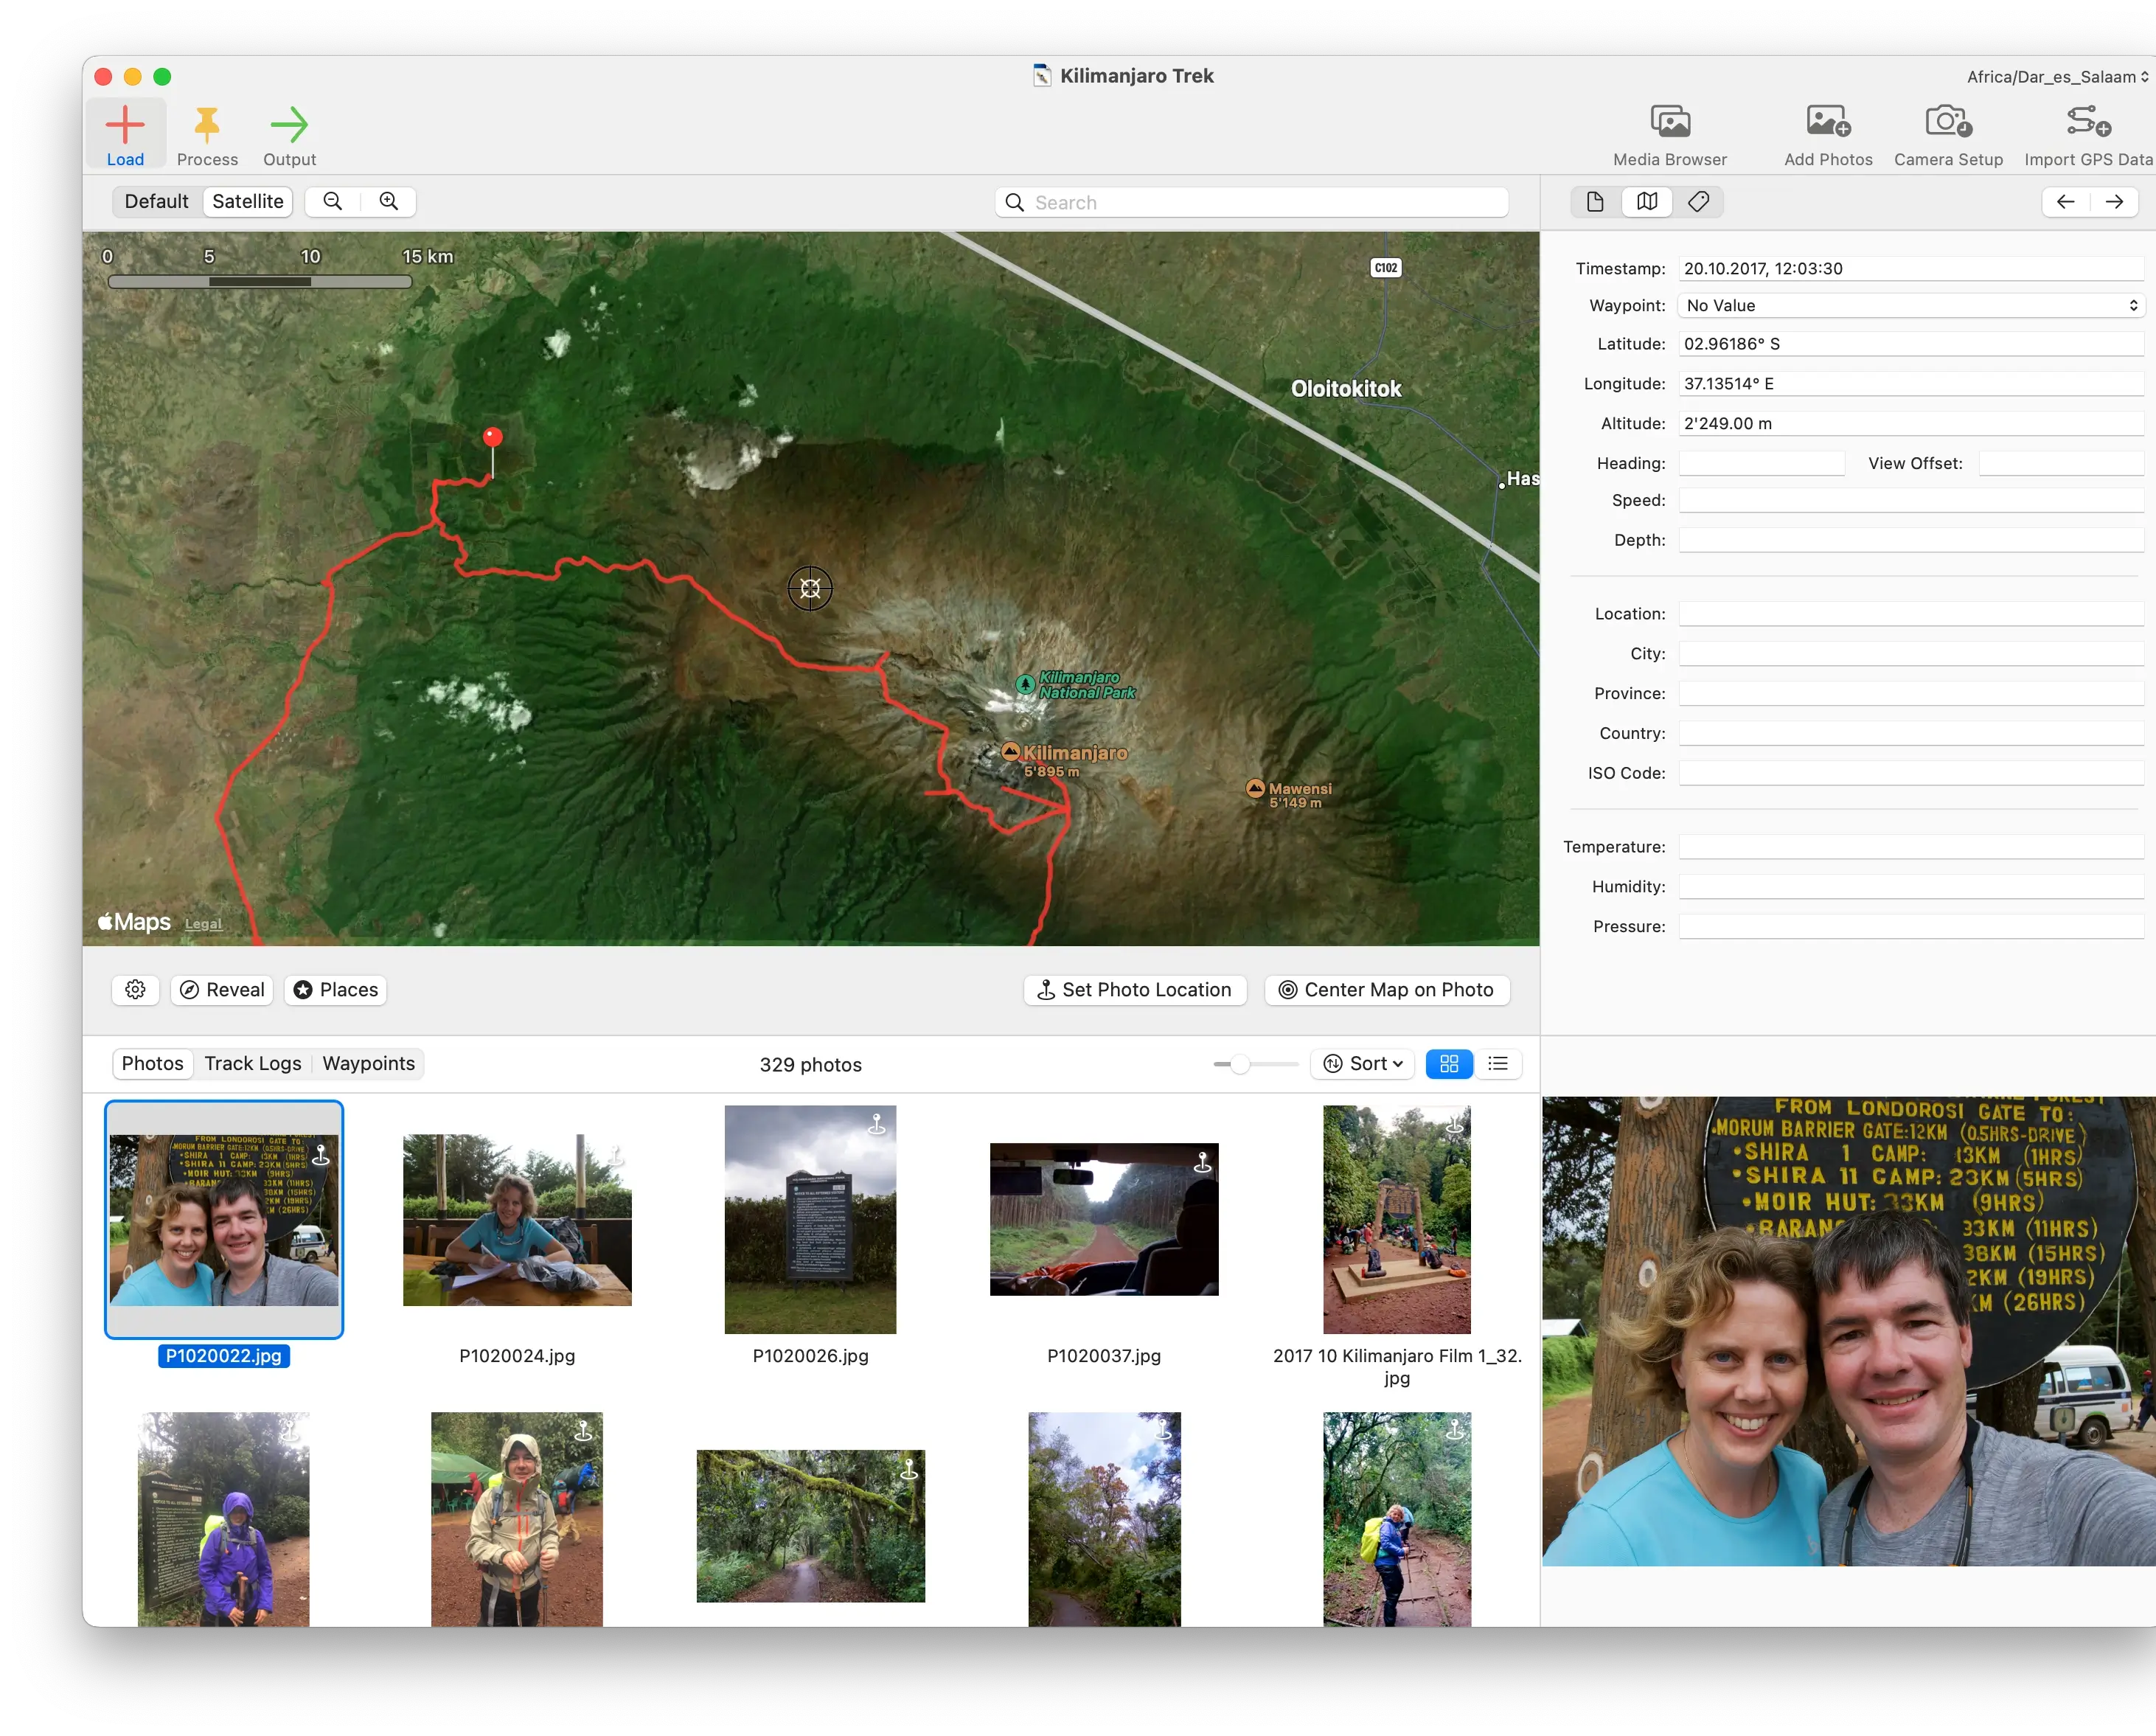
Loading photos and a GPX file into HoudahGeo is the first step of the geotagging workflow. HoudahGeo reads the capture timestamp from the EXIF DateTimeOriginal field of each photo — this timestamp is what it will later match against the GPS track.
Load Your Photos
Drag photos from Finder into the HoudahGeo window, or use Load > Add Photos from Files…. HoudahGeo supports JPEG, TIFF, and most RAW formats including CR2, CR3, NEF, ARW, and DNG. It reads the DateTimeOriginal EXIF field from each file — the timestamp the camera recorded at shutter release.
Photos appear in the main list with filename, capture time, and location status: Unassigned (no GPS data yet), Assigned (matched to GPS track), or Camera GPS (location already embedded by a GPS-enabled camera).
Load the GPX File
Drag your .gpx file onto the HoudahGeo window, or use Load > Import Track Logs and Waypoints from Files…. The track appears on the built-in map as a colored line showing your route. For multi-day trips, load multiple GPX files — HoudahGeo merges them into a single continuous track automatically.
HoudahGeo accepts GPX, NMEA, Garmin FIT, and Wintec TES files at this stage. If your file is a different format, convert it first with GPSBabel.
Step 2 — Process: Clock Adjustment and Timestamp Matching
GPS photo matching works by comparing each photo's capture timestamp — stored in the EXIF DateTimeOriginal field — against the timestamped track points in the GPX file. HoudahGeo finds the two track points that bracket each photo's capture time and interpolates the exact position between them.
How GPX Interpolation Works
GPX interpolation for photo geotagging is the calculation that estimates a photo's location when no GPS track point exists at the exact capture time. When you run Process > Geocode using GPS data…, HoudahGeo performs this calculation for each photo:
- Locate the track point recorded immediately before the photo's capture time
- Locate the track point recorded immediately after the photo's capture time
- Interpolate the photo's position along the straight line between those two points, weighted by how much time had elapsed
A GPS logging interval of 1–10 seconds produces accurate results for foot travel and vehicle travel alike. At a 10-second interval and walking pace (5 km/h), the maximum interpolation error is approximately 14 meters — within the accuracy of consumer GPS hardware itself.
Camera Clock Offset — Why It Matters and How to Fix It
A camera clock offset is the difference in seconds between the time shown on a camera and the true GPS time (UTC). Because geotagging relies on matching timestamps, any offset causes every photo to be placed at the location the photographer was at offset seconds earlier or later — not where the photo was actually taken.
One Minute Off = Over a Kilometer Wrong
A camera clock that is 60 seconds behind GPS time assigns every photo to the location from 60 seconds before the shutter fired. At 60 km/h (highway driving), that is a 1 km error. At 5 km/h (walking pace), it is still an 83-meter error. Always verify clock synchronization before a shoot, and use HoudahGeo's offset correction tools when the camera clock has drifted.
HoudahGeo provides three methods to measure and correct the camera clock offset:
Photo Time Method
Photograph a reliable time display — your iPhone's clock screen or the GPS device's display — at the start or end of your shoot. HoudahGeo reads the capture timestamp from that reference photo and compares it to the time visible in the image, calculating the offset to the nearest second.
Manual Offset Entry
Enter the camera's time zone and clock drift in seconds directly. Use this when you know the exact offset from a prior calibration session, or when your camera can display UTC time for direct comparison.
Photo Location Method
Pin a specific photo to its known location on the map. HoudahGeo reverse-calculates the time offset by finding which point on the GPS track is closest to that pinned location, then deriving how many seconds the camera clock must be adjusted to produce that match.
Reviewing and Correcting Locations on the Map
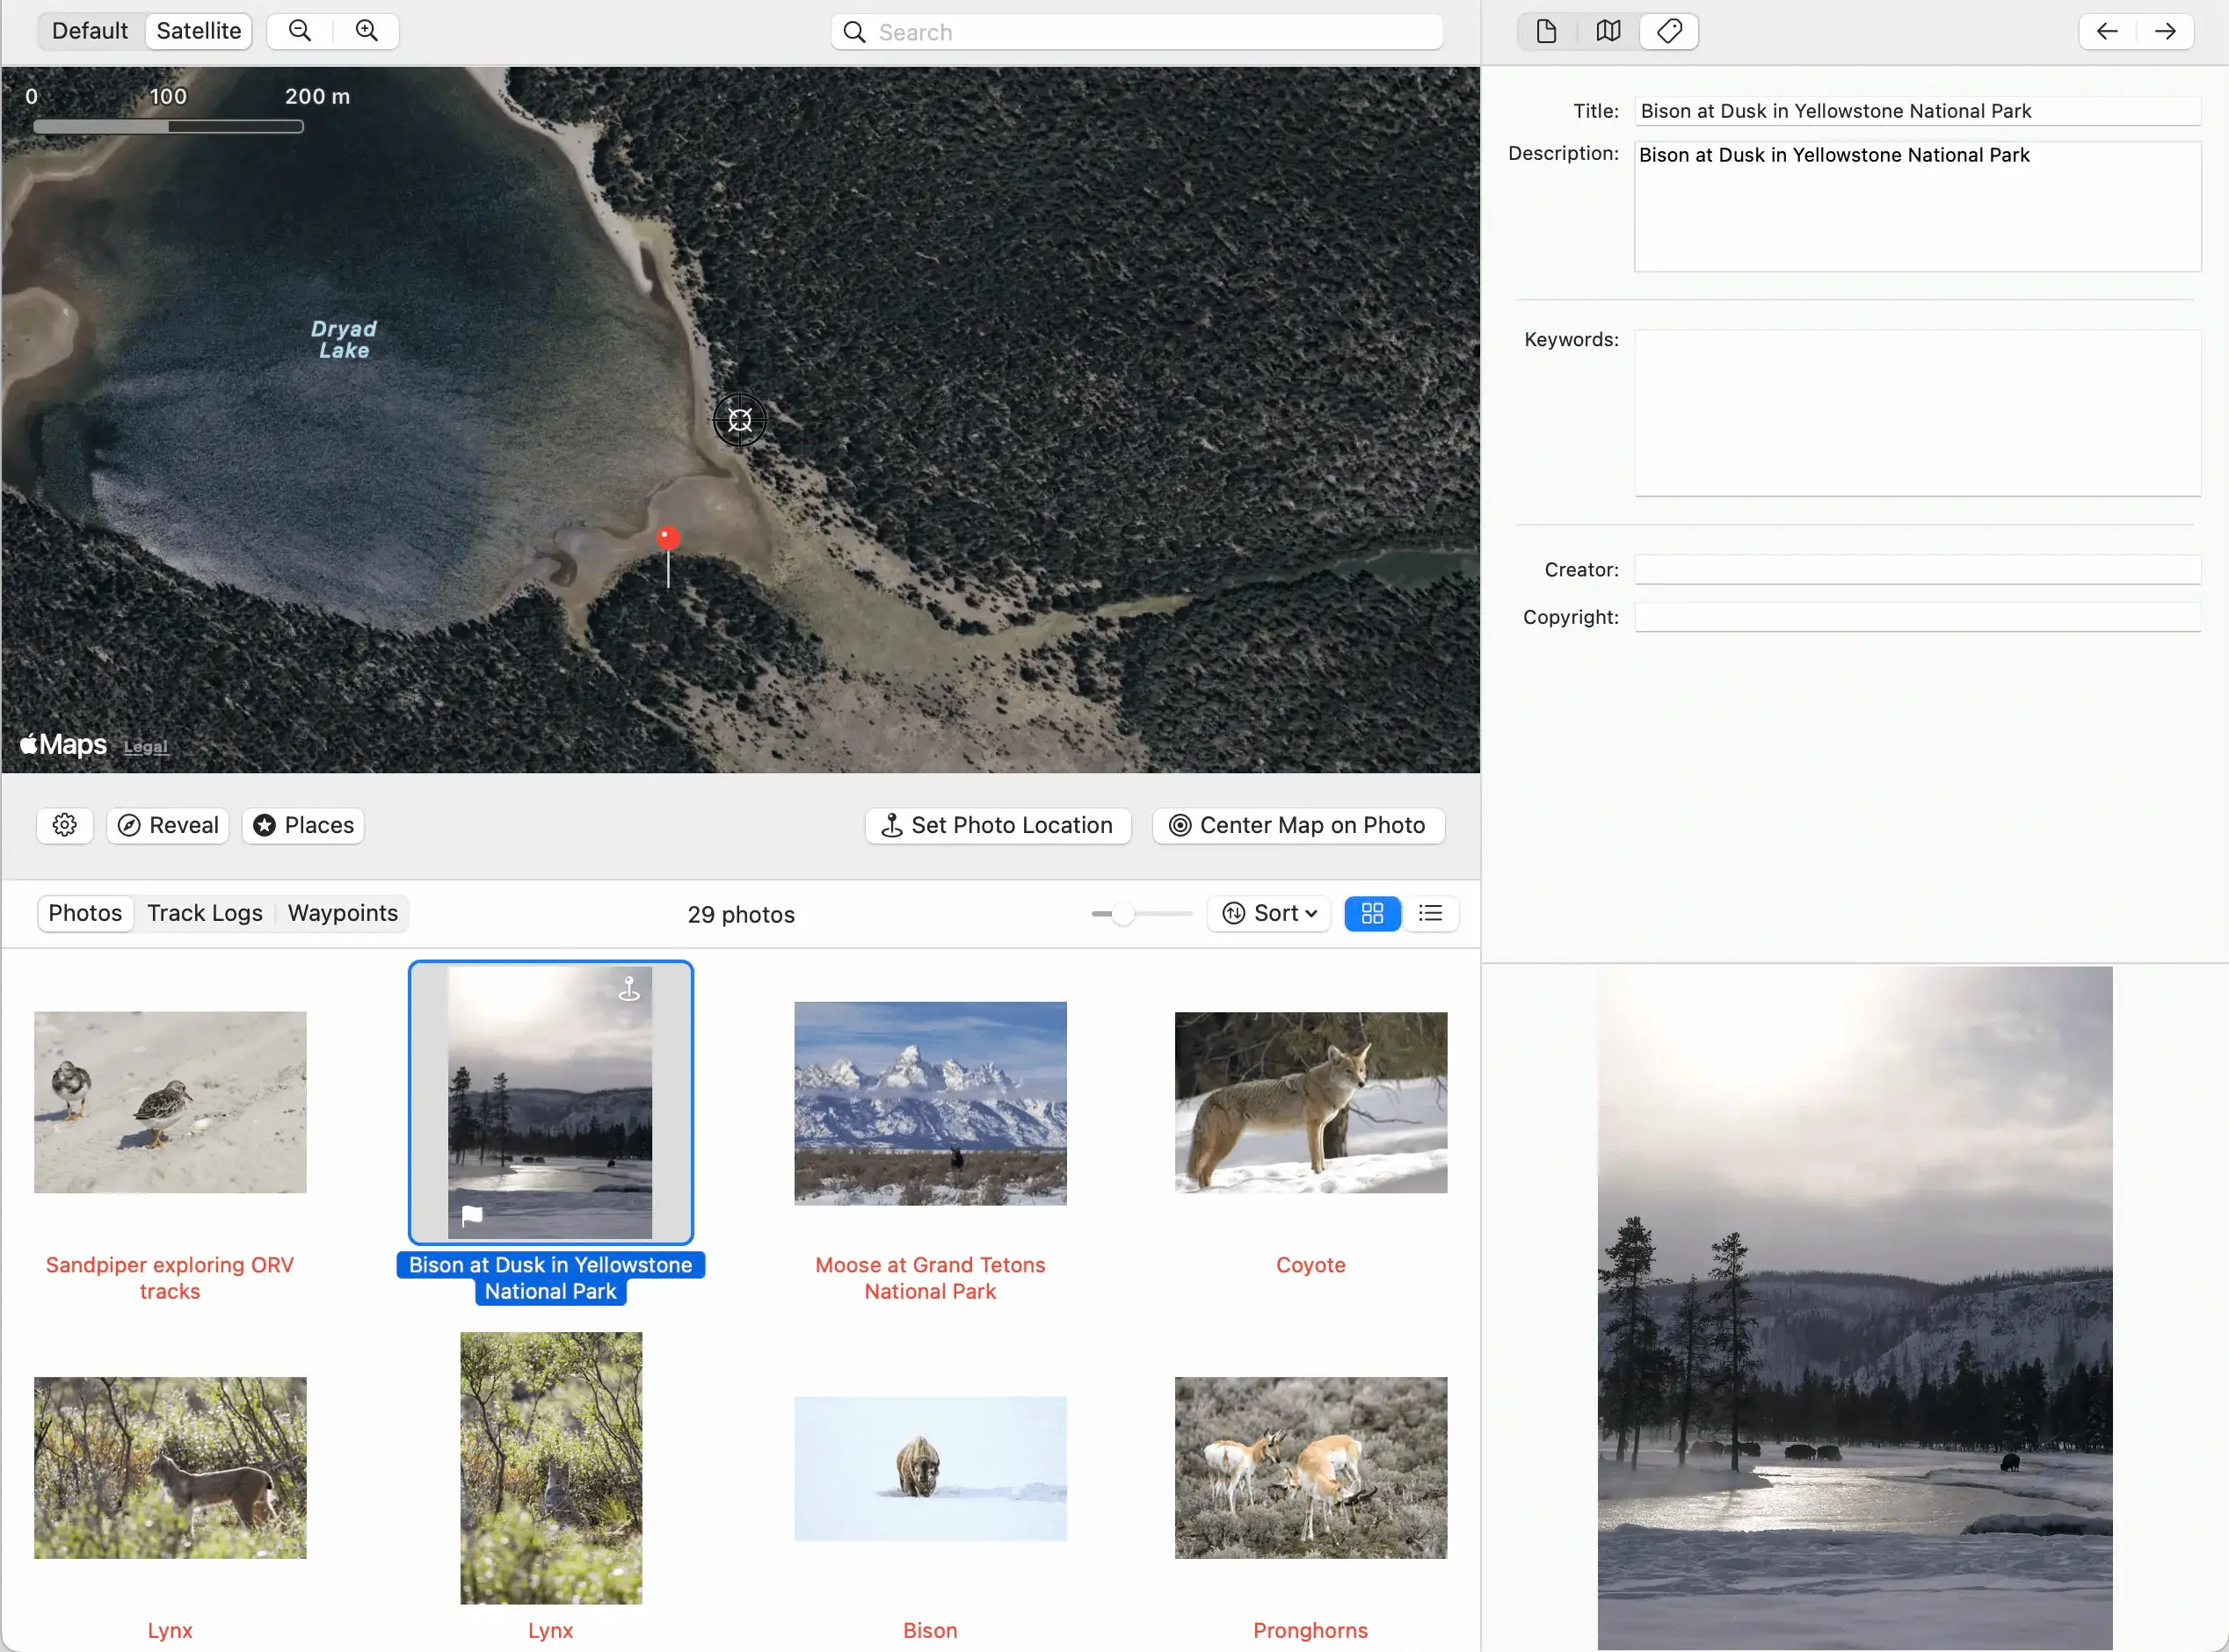
After geocoding, every matched photo appears as a pin on the built-in map. Click any photo in the list to jump to its assigned position. Switch to satellite view to verify locations against landmarks visible in the photo.
If a pin is incorrect — for example, because the GPS drifted while you were stationary — drag it to the exact position by hand. Manual corrections override the interpolated coordinate without affecting surrounding photos.
Step 3 — Output: Write EXIF/XMP to Files
Writing GPS metadata to photo files is the final step that makes geotagging permanent. HoudahGeo embeds GPS coordinates directly into each photo's EXIF data — so the location travels with the file, visible in any app that reads standard photo metadata.
Writing GPS Metadata to Your Photos
Choose Output > EXIF/XMP Export… to permanently embed metadata into your photo and video files.
Which files get updated: Choose to write only to geotagged photos, or limit the export to your current selection.
Which fields get written: You control exactly what metadata is embedded:
- Timestamp and time zone
- Location coordinates (latitude & longitude)
- Altitude, heading, viewing direction, speed, water depth
- IPTC location names: city, province/state, and country (added during the Process step via reverse geocoding)
- Title / headline, description / caption, keywords
- Creator and copyright information
XMP sidecar handling: Three options let you control how HoudahGeo interacts with .xmp sidecar files:
- Write to sidecar if present — uses an existing sidecar; writes directly to the image or video file if none exists
- Always use sidecar — creates a sidecar if missing, never touches the image or video file
- Write to photo file, ignore sidecar — always writes directly to the file
Create Copies: Write to copies of your files, leaving originals untouched.
Notify Apple Photos: Once the export completes, HoudahGeo can update the Apple Photos library for any photos it manages — so the location appears correctly in the Photos app too. See the full Apple Photos GPS workflow for iCloud-specific considerations.
The Complete GPX Geotagging Workflow
Geotagging photos with a GPX track log takes six steps from camera to finished file. The entire process — from loading photos to writing GPS metadata — typically takes under five minutes for a batch of 500 photos.
- Before your shoot: sync your camera clock, start your GPS tracker
- Shoot normally — GPS records your track in the background
- After the shoot: load photos + GPX file into HoudahGeo
- Apply clock offset correction if needed (Photo Time Method)
- Review locations on the map; drag any incorrect pins
- Export EXIF/XMP to write GPS data permanently to files